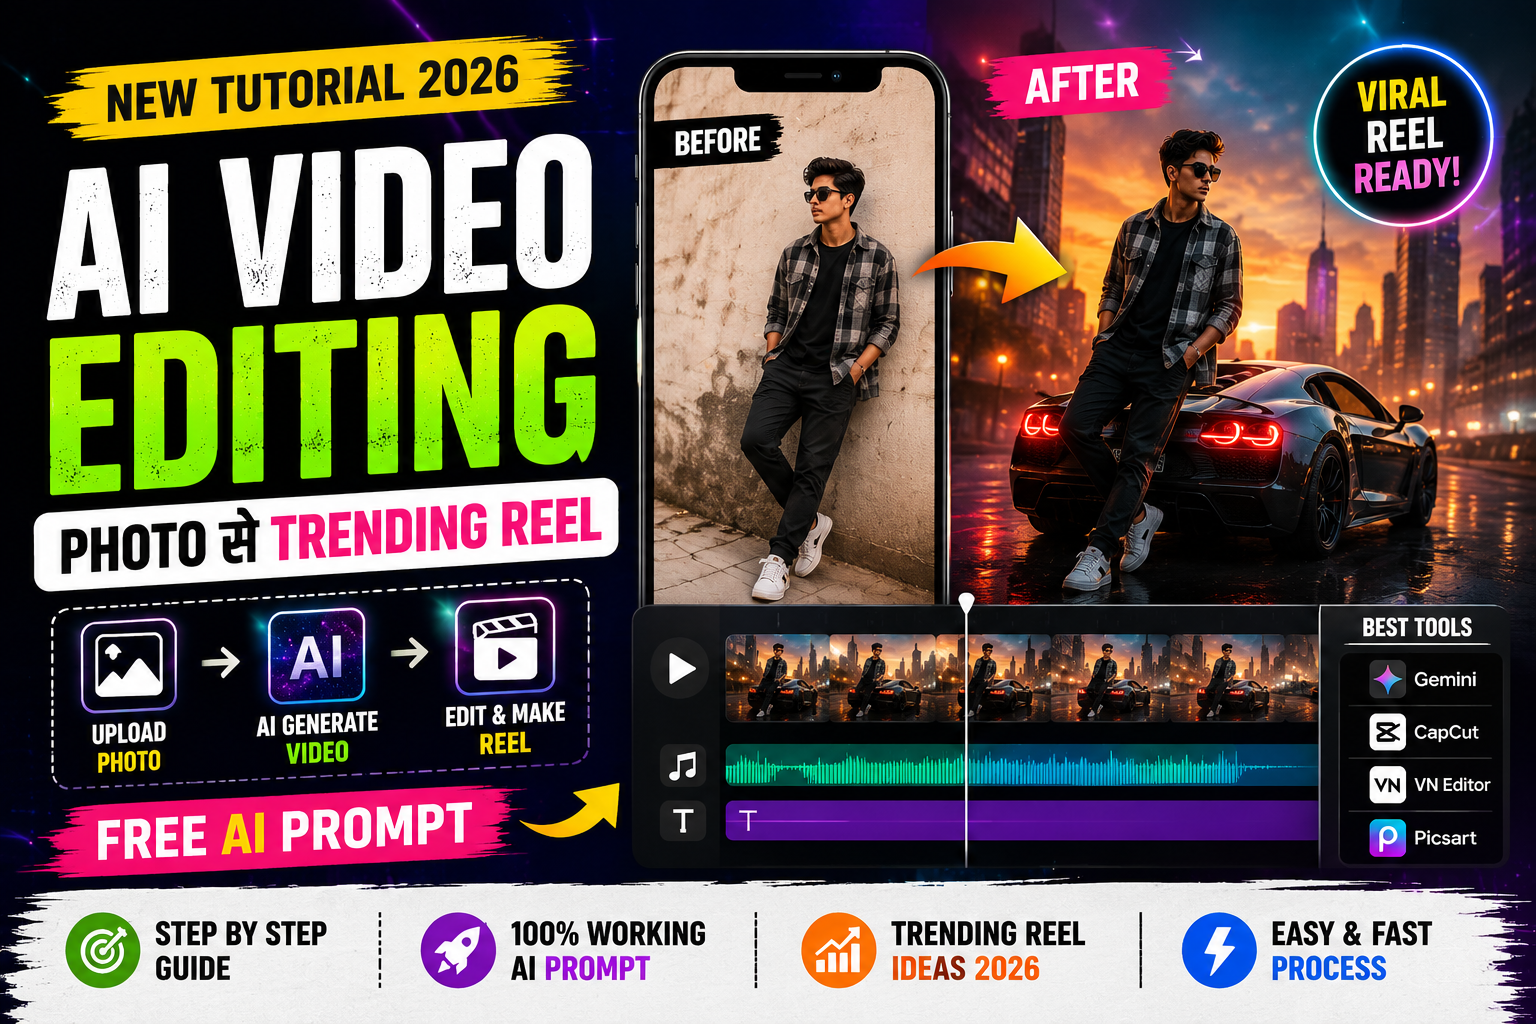
Viral AI Reels Kaise Banaye 2026? जानें Photo से AI Video बनाने का तरीका, copy-paste prompts, Gemini AI tutorial और trending Reels editing tips.
AI Video Prompt क्या होता है?
AI Video Prompt एक ऐसा text instruction होता है, जिसमें आप AI tool को बताते हैं कि आपको किस तरह का video चाहिए।
उदाहरण के लिए, अगर आप किसी normal photo को cinematic video में बदलना चाहते हैं, तो आप AI को लिख सकते हैं:
“Create a cinematic video from this photo, with natural body movement, slow camera zoom, realistic lighting and a beautiful sunset background.”
इसके बाद AI tool आपके prompt और उपलब्ध image references के आधार पर video generate करने की कोशिश करता है।
एक अच्छे AI Video Prompt में कुछ जरूरी बातें शामिल होती हैं:
- Subject: Video में कौन या क्या दिखाई देगा?
- Action: Subject क्या करेगा?
- Camera Movement: Camera zoom, pan या tracking कैसे करेगा?
- Lighting: Video में किस तरह की रोशनी होगी?
- Visual Style: Realistic, cinematic, animation या fantasy?
- Aspect Ratio: Video vertical होगा या landscape?
इन सभी details को सही तरीके से लिखने पर आपको अपने idea के ज्यादा करीब result मिल सकता है। हालांकि, हर AI tool हर instruction को बिल्कुल उसी तरह follow करे, इसकी guarantee नहीं होती।
Viral AI Reels बनाने के लिए क्या चाहिए?
AI Reel बनाने के लिए आपको शुरुआत में महंगे camera या professional editing setup की जरूरत नहीं होती। आप smartphone और एक अच्छे AI video generation tool से भी शुरुआत कर सकते हैं।
आपको मुख्य रूप से इन चीजों की जरूरत होगी:
1. Clear Photo
ऐसी photo चुनें जिसमें subject साफ दिखाई दे। अगर आप अपना video बनाना चाहते हैं, तो अच्छी lighting वाली और high-quality photo इस्तेमाल करें।
2. AI Video Generator
आप उपलब्धता और अपने account के अनुसार Gemini या किसी दूसरे AI video generation tool का इस्तेमाल कर सकते हैं। कुछ tools text-to-video, कुछ image-to-video और कुछ reference video editing की सुविधा देते हैं।
3. Ready-to-Use Prompt
Prompt में subject, movement, camera angle, lighting और video style की details दें। इस article में दिए गए prompts को अपनी जरूरत के अनुसार customize कर सकते हैं।
4. Video Editing App
AI से video generate होने के बाद आप CapCut, VN या किसी दूसरे compatible video editor में final editing कर सकते हैं।
5. Background Music
अपने video के mood के अनुसार music चुनें। Instagram की music library या उचित license वाले audio का इस्तेमाल करें, ताकि copyright संबंधी समस्याओं का जोखिम कम रहे।
Photo से AI Video कैसे बनाएं? (Step-by-Step Tutorial)
अगर आप पहली बार AI video बना रहे हैं, तो नीचे दिए गए steps follow करें।
Step 1: अपनी Photo Select करें
सबसे पहले एक clear photo चुनें। कोशिश करें कि चेहरे, कपड़ों और body की details साफ हों।
अगर आपको cinematic video बनाना है, तो ऐसी photo चुनें जिसमें subject के आसपास थोड़ा space हो। इससे AI को scene और camera movement तैयार करने में मदद मिल सकती है।
Step 2: AI Video Generator Open करें
अपने पसंदीदा AI video tool को open करें और देखें कि उसमें image-to-video या video generation का option उपलब्ध है या नहीं।
उदाहरण के लिए, Gemini में उपलब्ध video creation feature के जरिए supported accounts पर image या video references के साथ prompt देकर video बनाने और edit करने की सुविधा मिल सकती है। Feature access आपके plan और region पर निर्भर कर सकता है।
Step 3: Photo Upload करें
Upload या attachment option की मदद से अपनी photo select करें।
अगर tool reference image support करता है, तो यह image video के subject, appearance या overall visual direction को समझने में मदद कर सकती है।
Step 4: AI Video Prompt Paste करें
अब अपने video के हिसाब से prompt लिखें या नीचे दिए गए prompts में से किसी एक को copy करके इस्तेमाल करें।
उदाहरण:
“Animate this photo into a realistic cinematic video. Add subtle natural movement, a slow camera push-in, soft golden-hour lighting and realistic shadows. Preserve the subject’s recognizable appearance and keep the background visually consistent. Vertical 9:16 composition.”
Step 5: Video Generate करें
Prompt submit करने के बाद AI tool video generate करेगा। इसमें कुछ समय लग सकता है।
अगर पहला result अच्छा नहीं आता, तो पूरा prompt बदलने की बजाय एक बार में किसी एक चीज को सुधारें। उदाहरण के लिए, camera movement, lighting या subject action को अधिक स्पष्ट करें।
Step 6: Video Download करें
Generation पूरी होने के बाद उपलब्ध download या export option से video save करें।
Video की quality, duration और available export options इस्तेमाल किए जा रहे tool पर निर्भर करेंगे।
Step 7: Final Editing करें
अब video को अपने पसंदीदा editor में import करें।
जरूरत के अनुसार:
- Unnecessary frames trim करें।
- Music और sound effects add करें।
- Brightness और contrast adjust करें।
- Suitable transitions लगाएं।
- जरूरत होने पर captions add करें।
- Final export से पहले video को पूरा देखकर check करें।
इस तरह आप एक simple photo से AI-assisted short video तैयार कर सकते हैं।
Best AI Video Prompts for Instagram Reels
अब सबसे जरूरी हिस्सा है AI Video Prompts।
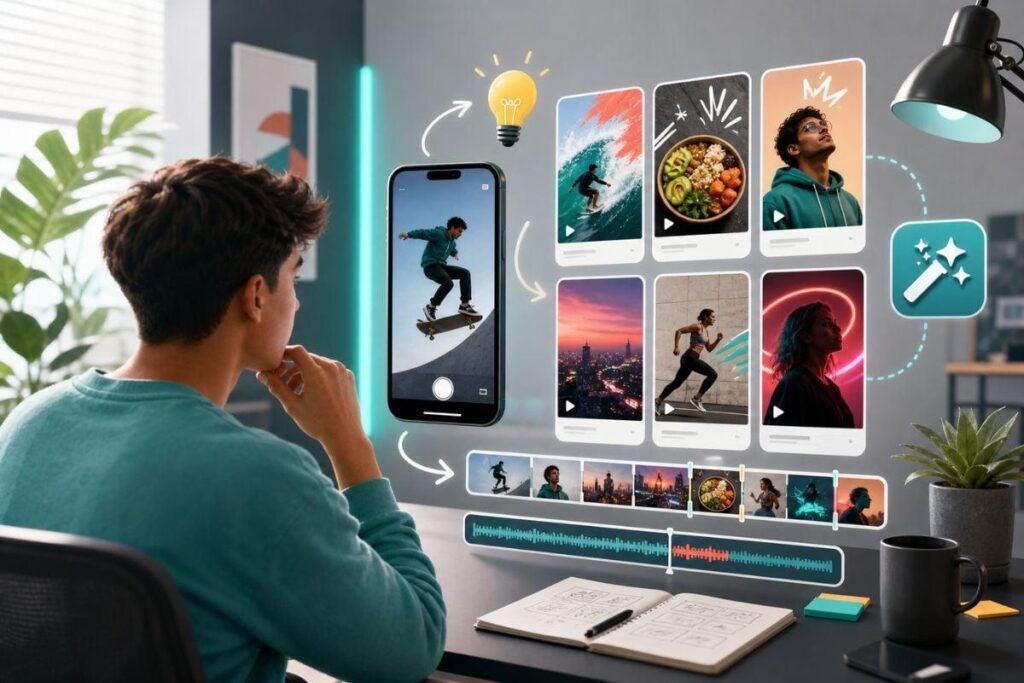
नीचे दिए गए prompts original examples हैं। इन्हें अलग-अलग AI video generators में इस्तेमाल करने के लिए बनाया गया है। हर tool का output अलग हो सकता है, इसलिए जरूरत के अनुसार prompt में बदलाव करें।
Prompt 1: Cinematic Photo to Video
अगर आप अपनी normal photo को cinematic look देना चाहते हैं, तो यह prompt इस्तेमाल कर सकते हैं।
Copy-Paste Prompt:
Create a realistic cinematic video using the uploaded photo as the main visual reference. Preserve the subject’s recognizable facial features, hairstyle, clothing and overall appearance. Add subtle natural body movement, a gentle camera push-in, realistic depth of field, soft cinematic lighting and natural shadows. Keep the scene visually consistent and avoid exaggerated motion, facial distortion, flickering or sudden background changes. Use a vertical 9:16 composition suitable for Instagram Reels. Make the final result look polished and realistic.
Best For: Personal Reels, profile videos और cinematic edits.
Prompt 2: Luxury Car Cinematic Reel
अगर आप luxury car या automotive-style Reel बनाना चाहते हैं, तो यह prompt इस्तेमाल करें।
Copy-Paste Prompt:
Create a cinematic vertical video featuring a luxury sports car driving slowly through a modern city street at golden hour. Use realistic vehicle motion, reflections on the car body, detailed road textures and natural lighting. Start with a low-angle close-up of the front wheel, then smoothly move the camera toward the side of the car before ending with a wide cinematic shot. Maintain consistent car design, proportions and color throughout the video. Add subtle motion blur and realistic shadows. No text, no added logos and no unnatural vehicle movement. Aspect ratio 9:16.
Best For: Car edits, automotive pages और cinematic short videos.
Prompt 3: Sunset Walking Reel
इस prompt से आप travel या lifestyle-style video बनाने की कोशिश कर सकते हैं।
Copy-Paste Prompt:
Animate the uploaded photo into a realistic lifestyle video. Show the subject walking slowly along a beautiful beach during sunset, with gentle ocean waves, a soft breeze and natural clothing movement. Use warm golden-hour lighting, realistic skin tones and a smooth tracking camera. Keep the subject’s appearance consistent with the reference image. Add subtle depth of field and natural environmental motion. Avoid distorted hands, unnatural walking, flickering and sudden scene changes. Vertical 9:16 framing, cinematic visual style.
Best For: Travel Reels, lifestyle content और aesthetic videos.
Prompt 4: Futuristic AI Transformation
अगर आप futuristic या sci-fi visual बनाना चाहते हैं, तो यह prompt इस्तेमाल करें।
Copy-Paste Prompt:
Create a futuristic cinematic video inspired by the uploaded image. Place the subject in a high-tech city at night with glowing architectural lights, subtle holographic displays and reflections on wet streets. Use a slow cinematic camera orbit, realistic lighting and detailed environmental textures. Preserve the subject’s recognizable appearance and keep the main character consistent throughout the shot. Use blue and violet ambient lighting, controlled visual effects and smooth natural movement. Avoid excessive particles, distorted faces, unreadable text and flickering objects. Vertical 9:16 format.
Best For: Sci-fi edits, futuristic Reels और technology content.
Prompt 5: Slow Motion Portrait Reel
यह prompt portrait और fashion-style video के लिए उपयोगी हो सकता है।
Copy-Paste Prompt:
Turn the uploaded portrait into a realistic slow-motion cinematic video. Preserve the subject’s facial appearance, hairstyle and clothing. Add a gentle breeze moving the hair and fabric naturally, subtle head movement and a slow camera push-in. Use soft directional lighting, realistic skin texture and a blurred background with natural depth of field. Keep the subject’s face stable and recognizable throughout the shot. Avoid artificial facial expressions, excessive smoothing and unnatural body movement. Vertical 9:16 composition, high-quality cinematic look.
Best For: Portrait videos, fashion edits और profile Reels.
AI Video Prompt में Reference Image और Reference Video का इस्तेमाल कैसे करें?
कुछ AI video tools में आप केवल text prompt के बजाय image या video reference भी दे सकते हैं।
Reference image का इस्तेमाल तब करें, जब आपको subject, clothing, environment या visual style के बारे में ज्यादा control चाहिए।
Reference video तब उपयोगी हो सकता है, जब supported tool में किसी existing clip की motion या scene structure के आधार पर editing करने की सुविधा उपलब्ध हो।
उदाहरण के लिए, अगर आप अपनी photo को किसी cinematic walking scene में बदलना चाहते हैं, तो आप अपनी photo upload करके prompt में walking direction, camera movement और background details बता सकते हैं।
यदि आप reference video इस्तेमाल कर रहे हैं, तो ध्यान रखें कि किसी दूसरे creator का पूरा video, music, character या unique scene sequence बिना अनुमति reproduce करना copyright या privacy संबंधी समस्या पैदा कर सकता है।
बेहतर तरीका यह है कि आप reference से केवल सामान्य creative idea लें और अपना अलग scene, camera movement और editing style बनाएं।
AI Video में अपना Face Consistent कैसे रखें?
AI-generated videos में कभी-कभी चेहरे या कपड़ों में बदलाव दिखाई दे सकता है। इसे कम करने के लिए कुछ practical tips अपनाएं।
1. Clear Reference Image इस्तेमाल करें
ऐसी photo चुनें जिसमें चेहरा स्पष्ट हो और lighting अच्छी हो।
2. Identity Instructions स्पष्ट रखें
Prompt में लिखें:
“Use the uploaded photo as the identity reference for the main subject. Preserve the subject’s recognizable facial features, hairstyle and skin tone throughout the shot.”
3. Simple Movement चुनें
शुरुआत में walking, looking toward the camera या slow camera zoom जैसी movements इस्तेमाल करें। बहुत ज्यादा complex action से visual consistency बनाए रखना मुश्किल हो सकता है।
4. Scene में Unnecessary Changes न मांगें
अगर आपका लक्ष्य एक consistent portrait video है, तो एक साथ कई background changes, costume changes और fast transitions की मांग न करें।
5. जरूरत होने पर दोबारा Generate करें
कभी-कभी बेहतर output पाने के लिए prompt को refine करना या दूसरी reference image इस्तेमाल करना जरूरी हो सकता है।
ध्यान दें कि ये techniques consistency बेहतर करने में मदद कर सकती हैं, लेकिन किसी भी AI tool में perfect identity preservation की guarantee नहीं होती।
AI Reels को CapCut या दूसरे Editor में कैसे Edit करें?
AI से video generate करना पहला step है। अच्छी final Reel के लिए editing भी महत्वपूर्ण है।
Step 1: Video Import करें
अपने generated video को CapCut, VN या किसी compatible editor में import करें।
Step 2: Unwanted Parts Remove करें
Video की शुरुआत और अंत में यदि कोई unwanted frames हैं, तो उन्हें trim कर दें।
Step 3: Music Add करें
Video के mood के अनुसार background music चुनें। Music की timing को visual action के साथ match करने की कोशिश करें।
Step 4: Speed Ramp का इस्तेमाल करें
जहां action तेज दिखाना हो, वहां speed ramp या speed adjustment का इस्तेमाल कर सकते हैं। इसे जरूरत से ज्यादा इस्तेमाल करने पर video unnatural लग सकता है।
Step 5: Cutout और Transition Effects लगाएं
यदि आपके editor में subject cutout, masking या background removal की सुविधा है, तो उसे सही जगह इस्तेमाल करें। हर shot पर effect लगाने के बजाय कुछ महत्वपूर्ण moments पर focus करें।
Step 6: Color Correction करें
Brightness, contrast, highlights और saturation को adjust करें। कोशिश करें कि पूरी Reel में colors एक-दूसरे से मेल खाते हों।
Step 7: Export से पहले Review करें
Video को शुरुआत से अंत तक देखें। Face distortion, flickering, unnatural movement, audio mismatch और unwanted frames को check करें।
इसके बाद अपने platform और editing requirements के अनुसार suitable resolution और frame rate में export करें।
Viral AI Reel बनाने के लिए Best Settings
AI Reel के लिए कोई एक universal setting हर video पर काम नहीं करती। फिर भी short-form vertical content के लिए ये सामान्य recommendations उपयोगी हो सकती हैं।
- Aspect Ratio: 9:16 vertical
- Resolution: 1080 × 1920, यदि source और editor support करें
- Frame Rate: 30 FPS एक सामान्य starting point है
- Video Length: अपने idea और platform के अनुसार चुनें
- Hook: पहले 1–2 seconds में interesting visual या action दिखाएं
- Audio: Clear, properly synced और appropriately licensed audio इस्तेमाल करें
अगर आप YouTube Shorts और Instagram Reels दोनों पर video publish करना चाहते हैं, तो clean master export रखें। जरूरत के अनुसार हर platform के लिए captions और presentation अलग कर सकते हैं।
ध्यान रखें कि केवल high resolution या effects से video viral नहीं होता। Idea, opening hook, pacing, storytelling और audience interest भी महत्वपूर्ण हैं।
AI Video Editing से पैसे कैसे कमाएं?
अगर आपको AI video generation और editing में रुचि है, तो आप इसे skill के रूप में विकसित कर सकते हैं। इससे income के कुछ संभावित रास्ते बन सकते हैं।
Freelance AI Video Editing
आप creators, local businesses या brands के लिए short videos बनाने और edit करने की service दे सकते हैं।
शुरुआत में कुछ sample projects तैयार करें, ताकि potential clients आपका काम देख सकें।
Social Media Content Services
कई छोटे businesses को Reels, promotional videos और product visuals की जरूरत होती है। आप उनके लिए AI-assisted content creation service offer कर सकते हैं।
YouTube Tutorials
आप AI Video Prompts, photo-to-video tutorials और editing techniques पर educational videos बना सकते हैं।
Website पर AI Prompts Publish करना
यदि आपकी अपनी website है, तो आप अलग-अलग categories में useful AI Video Prompts, tutorials और examples प्रकाशित कर सकते हैं।
उदाहरण के लिए:
- Cinematic AI Video Prompts
- AI Car Video Prompts
- AI Animation Prompts
- Photo to Video AI Prompts
- YouTube Shorts AI Prompts
इन सभी तरीकों में income की कोई guarantee नहीं होती। Results आपकी skill, portfolio, audience, demand और business strategy पर निर्भर करेंगे।
AI Video बनाते समय होने वाली गलतियां
AI video generation में beginners अक्सर कुछ सामान्य गलतियां करते हैं।
गलती 1: बहुत छोटा या अस्पष्ट Prompt
केवल “Make a viral video” लिखने से AI को scene और motion के बारे में पर्याप्त जानकारी नहीं मिलती। Subject, action और camera movement स्पष्ट लिखें।
गलती 2: एक ही Prompt में बहुत सारे Actions
एक छोटे clip में बहुत ज्यादा actions डालने से scene confusing हो सकता है। पहले simple shot बनाएं, फिर अलग clips generate करके उन्हें edit करें।
गलती 3: Face और Hands को Check न करना
AI video में facial details या hands कभी-कभी unnatural हो सकते हैं। Publish करने से पहले पूरा video review करें।
गलती 4: हर Trend को Copy करना
किसी दूसरे creator के exact video को recreate करने की बजाय अपनी storytelling और visual style विकसित करें।
गलती 5: Copyright को Ignore करना
दूसरे लोगों की photos, videos और music का इस्तेमाल करने से पहले जरूरी permissions और licenses check करें।
गलती 6: Viral होने की Guarantee मानना
AI tool video बनाने में मदद कर सकता है, लेकिन views, reach या followers की guarantee नहीं देता।
Frequently Asked Questions (FAQs)
Q1. Viral AI Reels Kaise Banaye?
सबसे पहले एक clear photo या video concept चुनें। फिर किसी compatible AI video generator में image upload करें, detailed prompt दें, video generate करें और final editing के बाद उसे publish करें।
Q2. Photo से AI Video बनाने के लिए कौन-सा Tool इस्तेमाल करें?
आप अपने account में उपलब्ध सुविधाओं के अनुसार Gemini या दूसरे image-to-video tools का इस्तेमाल कर सकते हैं। किसी tool को चुनने से पहले उसकी current features, pricing और usage limits check करें।
Q3. क्या AI से अपनी Photo को Video में बदल सकते हैं?
हां, image-to-video सुविधा देने वाले tools में supported photo को animate किया जा सकता है। Output में motion, lighting और scene details tool तथा prompt के अनुसार बदल सकती हैं।
Q4. क्या AI Video बनाने के लिए Coding आना जरूरी है?
नहीं। सामान्य AI video generation के लिए coding की जरूरत नहीं होती। आपको अपना idea स्पष्ट तरीके से लिखना और उपलब्ध interface इस्तेमाल करना आना चाहिए।
Q5. AI Video Prompt में क्या लिखना चाहिए?
Prompt में subject, action, camera movement, lighting, background, visual style और aspect ratio जैसी details शामिल करें।
Q6. क्या AI से बनाई गई Reel Viral हो सकती है?
AI-generated Reel को भी अच्छी reach मिल सकती है, लेकिन इसकी कोई guarantee नहीं है। Original idea, engaging opening, watch time और audience interest पर ध्यान दें।
Q7. क्या AI Video Editing से पैसे कमा सकते हैं?
आप freelance editing, social media content services, educational content और अपने digital publishing projects के माध्यम से income के अवसर तलाश सकते हैं। कमाई की मात्रा निश्चित नहीं होती।
Q8. क्या किसी दूसरे की Photo से AI Video बनाना सही है?
किसी व्यक्ति की photo इस्तेमाल करने से पहले उसकी अनुमति लेना बेहतर है, खासकर जब आप उसे public या commercial use के लिए publish करने वाले हों। किसी की पहचान का गलत इस्तेमाल, deceptive content या privacy का उल्लंघन न करें।
Conclusion
AI Video Prompts की मदद से photo को creative short video में बदलना पहले की तुलना में अधिक accessible हो गया है। अब beginners भी cinematic scenes, lifestyle videos, futuristic visuals और social media content बनाने की कोशिश कर सकते हैं।
अगर आप शुरुआत कर रहे हैं, तो पहले एक clear photo चुनें, simple prompt इस्तेमाल करें और natural movement वाला छोटा video generate करें। इसके बाद music, color correction और transitions के साथ final editing करें।
इस article में दिए गए prompts को copy करके इस्तेमाल कर सकते हैं। बेहतर results के लिए इन्हें अपने subject और creative idea के अनुसार customize करें।
याद रखें, एक अच्छा AI video केवल effects से नहीं बनता। सही idea, clear prompt, consistent visuals और अच्छी editing मिलकर आपके content को ज्यादा engaging बना सकते हैं।
अब अपनी पहली AI Reel बनाएं, अलग-अलग prompts test करें और अपनी खुद की editing style विकसित करें।